How to Create and Manage Product Discounts
Targeted price reductions on specific products, brands, or categories are a good way to clear inventory, highlight new arrivals, or offer special deals on bestsellers.
How to Create a Product Discount
Follow the steps below to create and implement product discounts on your SiteGround E-commerce store.
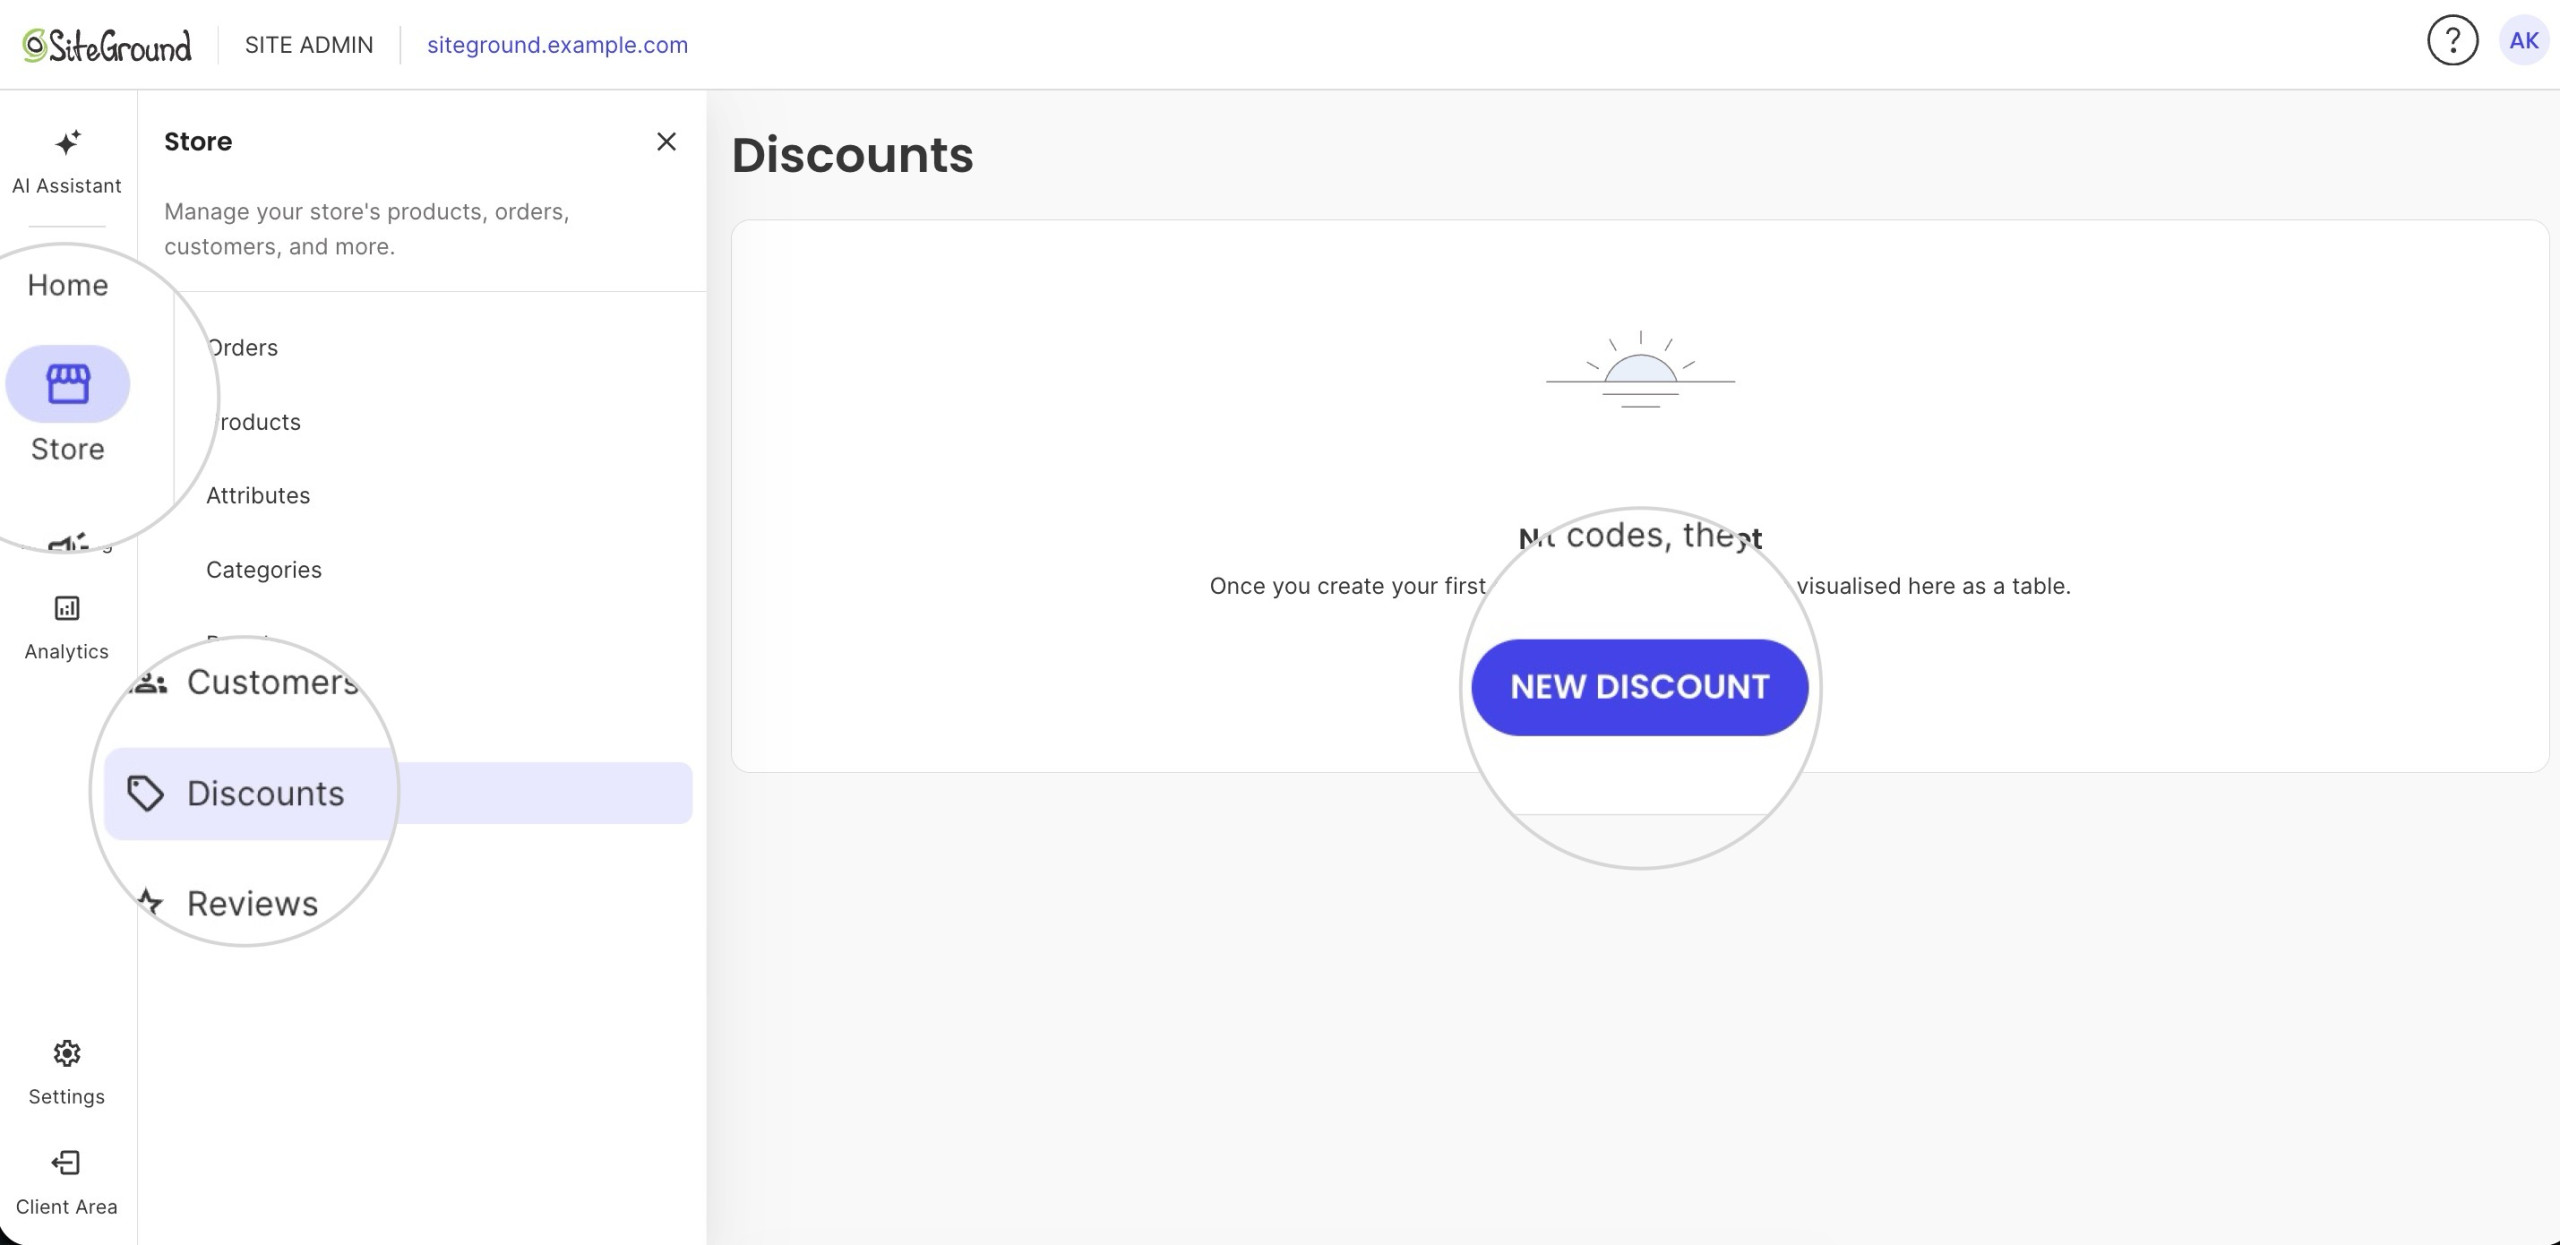
- Click on Store Manager -> Discounts. On this page, you will see a list of any existing discounts.
- Click the New Discount button in the upper right to add a new one.
- Select Product Discount from the Discount Type menu.
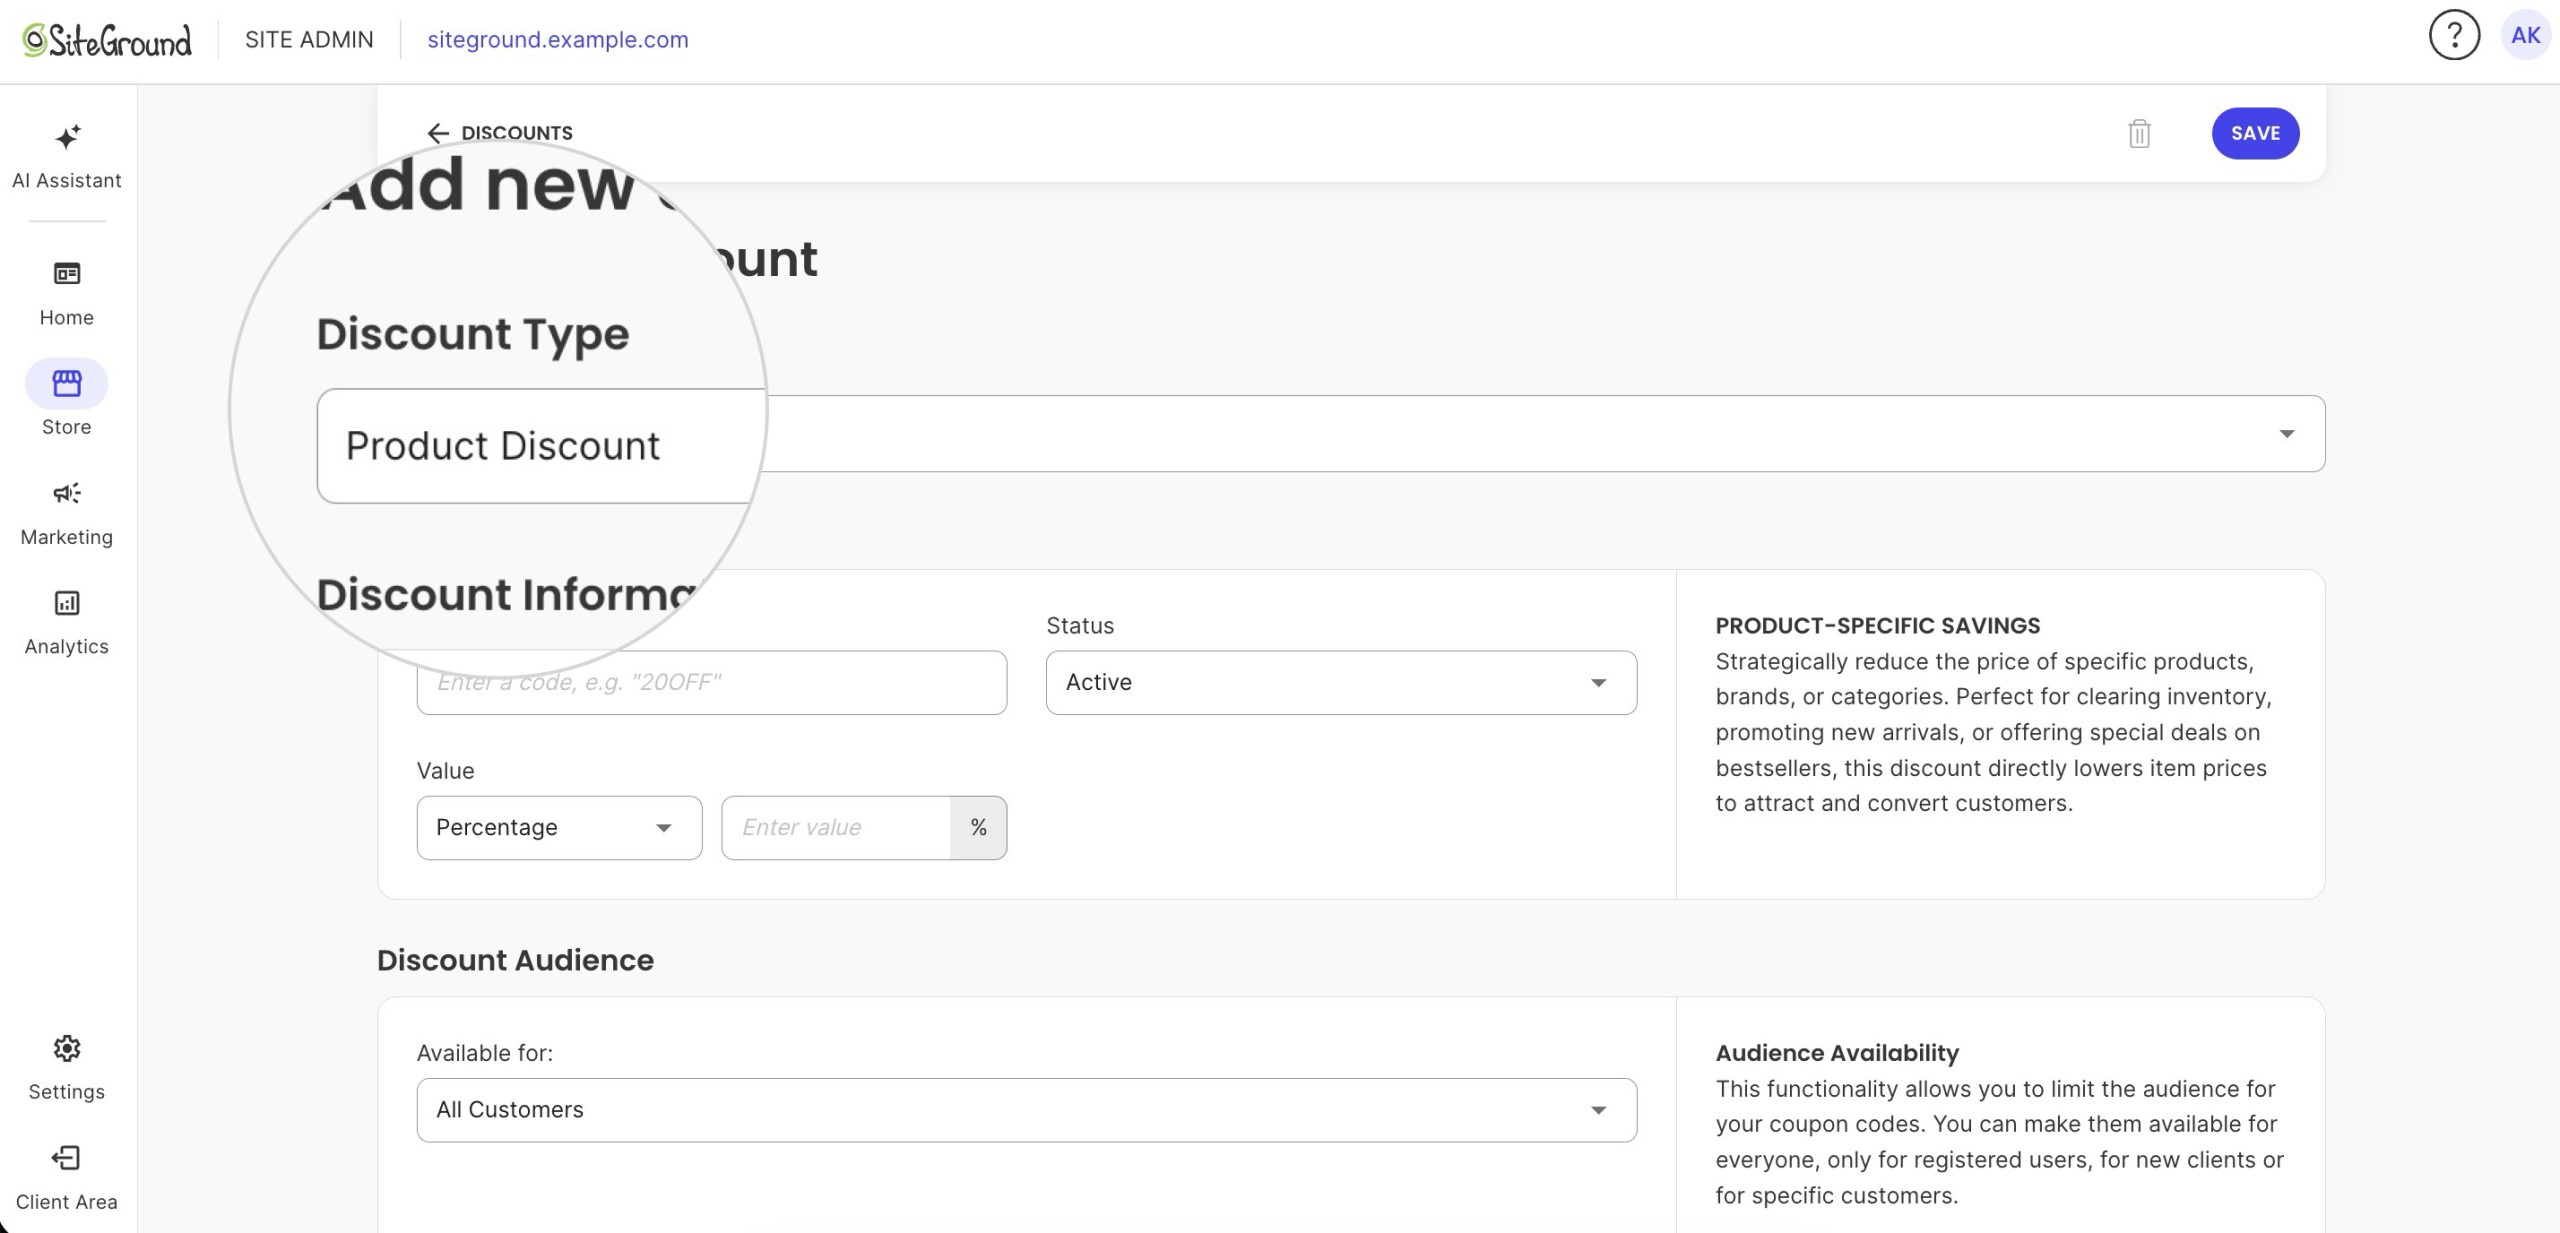
- Add the Discount Code name, Value (Percentage or Fixed amount) and set a Status.

- In the Discount Audience section, use the drop-down menu to choose who can use the discount:

- All Customers
- New Customers
- Registered Customers
- Specific Registered Customers
If you select Specific Registered Customers, start typing the name of a registered customer and choose them from the list.
Only the selected customers will be able to apply the discount, and they must be logged in to their accounts at checkout. Customers with Guest or Pending status will not appear in the list.
- Set Active Dates

You can set a Start and Expiry date to specify how long the discount code should be active.
If you leave the Expiry Date field blank, the code will be active until you manually set that Discount to “Inactive”
- Set a Discount Range

In this section, you specify the items (specific products, categories or brands) that can be discounted. You can also exclude specific products, categories, or brands from the discount. Any item that meets the criteria set in the Discount Range Exclude section will not receive a discount at checkout.
- Assign Discount Restrictions

You can define minimum and maximum spend thresholds, limit total code redemptions, and set per-customer usage limits for Discount Codes to prevent misuse and protect your margins.
- Click the Save button in the upper right.
How to Manage Existing Discounts
Once you’ve created discount codes, you can easily change their configuration later on from the management page. Click on Store Manager > Discounts > Actions menu (three-dots)
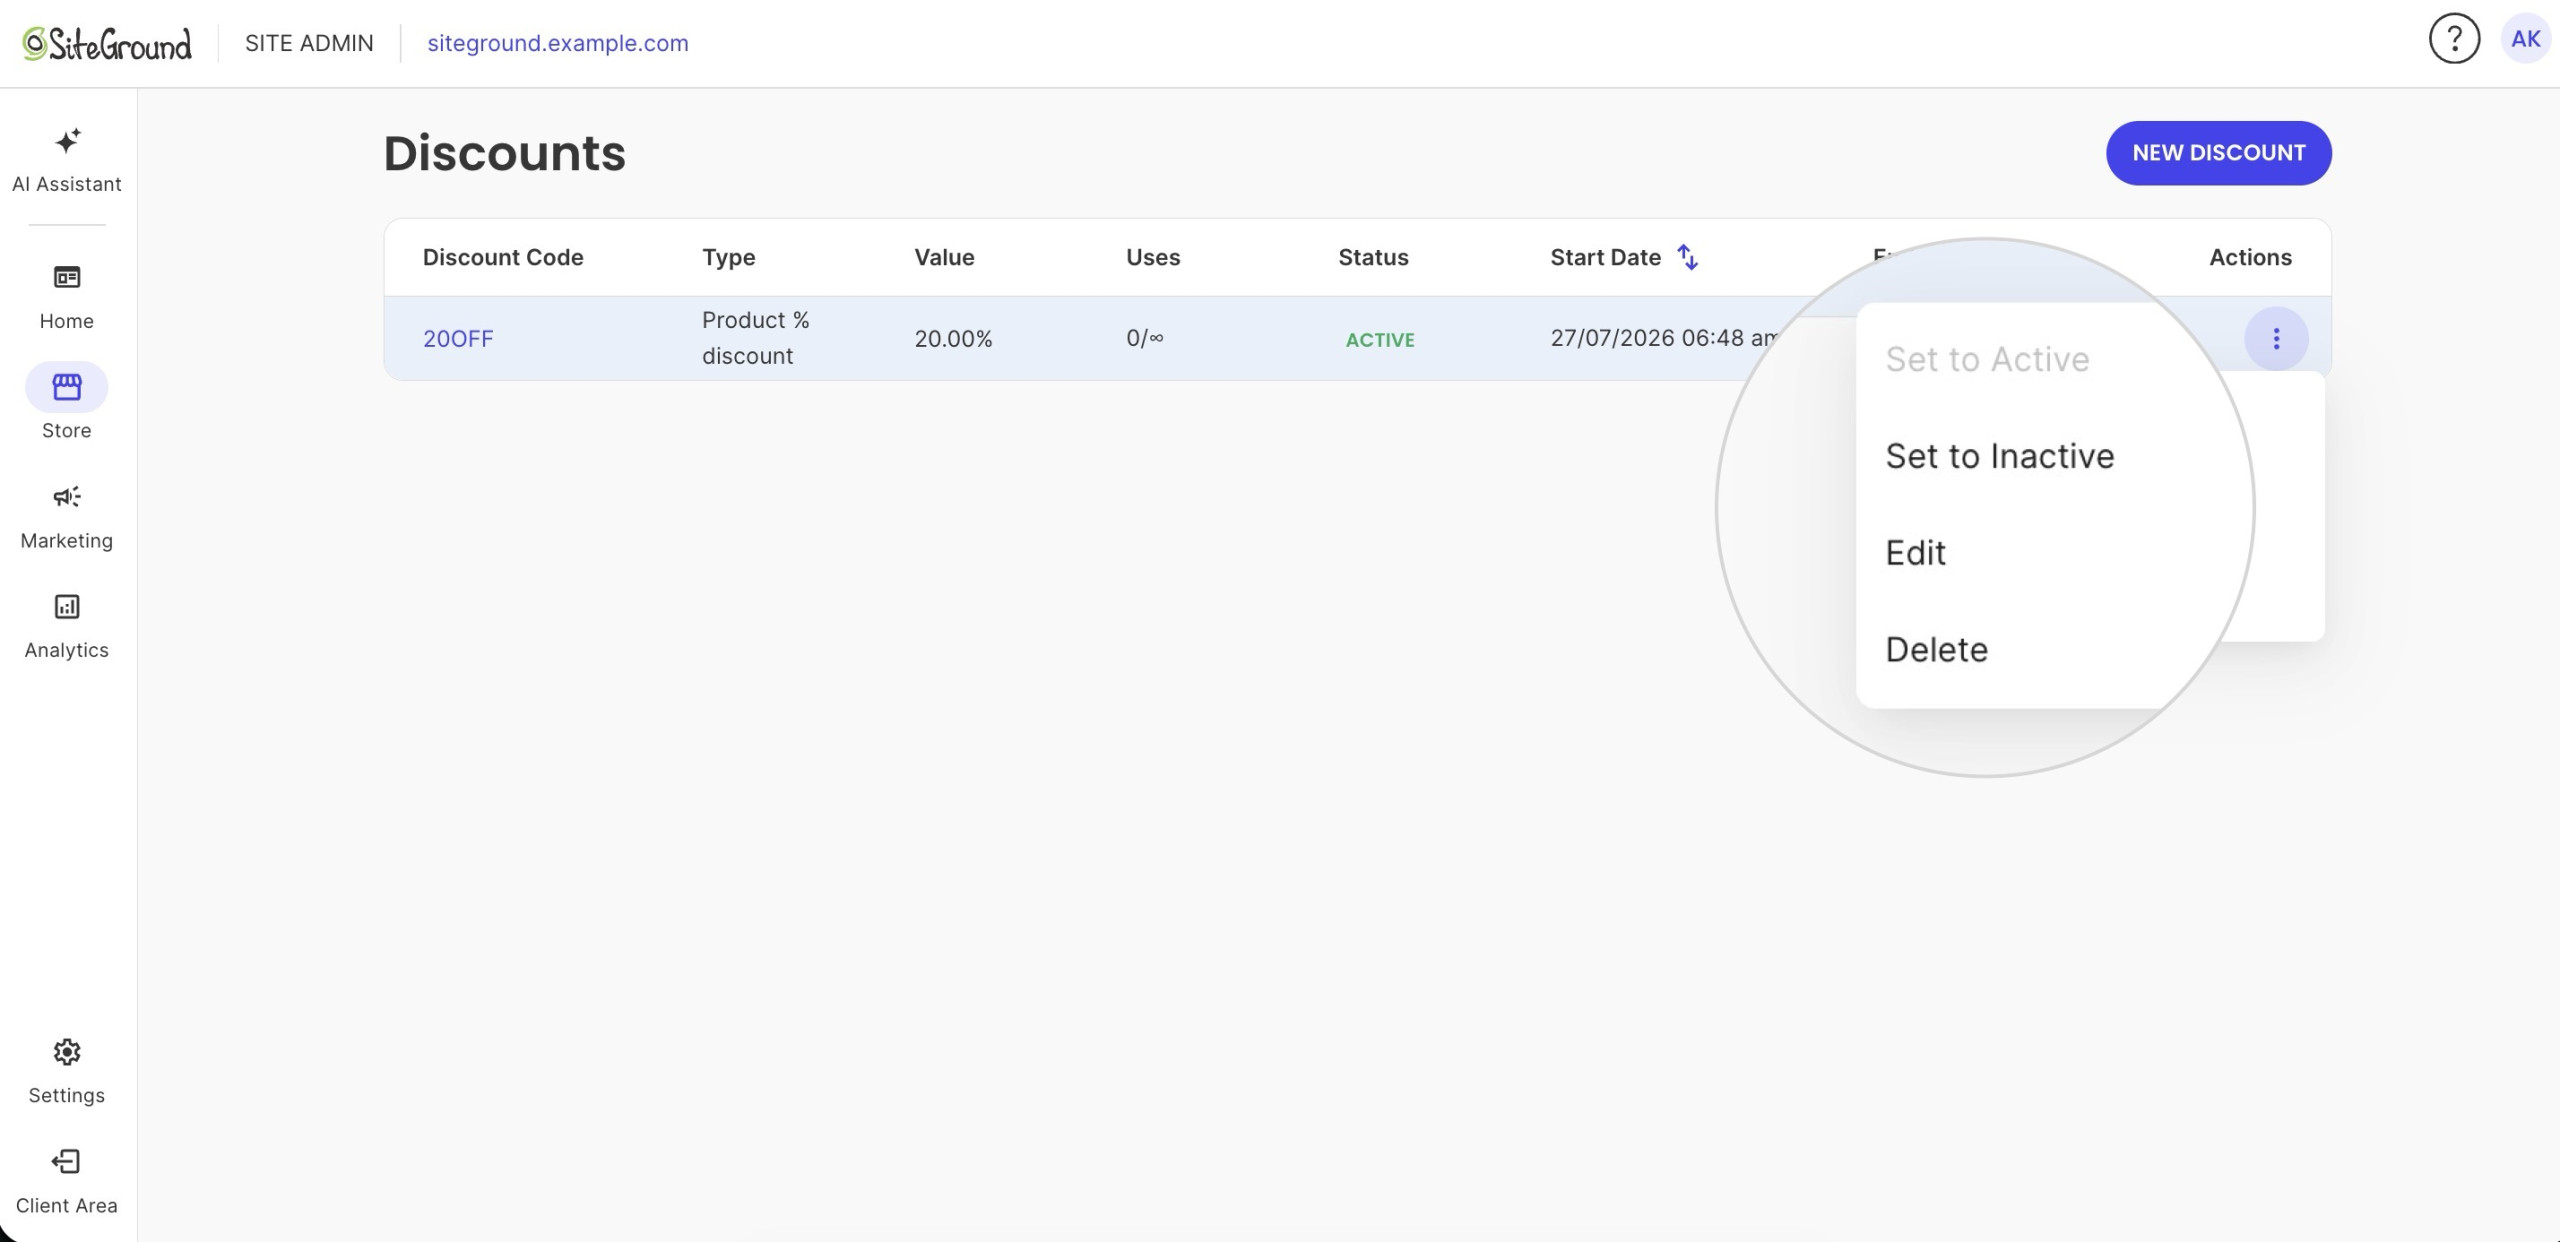
You can set an Inactive discount to Active, or vice-versa, edit any of the specific discount settings, or fully delete a code from the dashboard.
To explore additional discount options, check out our guides on How to Create a Cart Discount and How to Create a Free Shipping Discount.